Tag: Game Sessions

Alan Wake 2 Words Of Power Locations And...
Navigating the surreal and dark reality of the Dark Place in Alan Wake 2 presents players with unique survival challenges. To enhance Alan Wake's capabilities, players must locate hidden spiral glyphs scattered across the nightmare landscape. This complete overview breaks down how to discover these upgrades and spend them effectively throughout your playthrough.
Understanding Words of Power Mechanics
Words of Power are unique passive upgrade points exclusive to Alan's campaign sections. These markings appear as yellow spirals painted on walls, ceilings, and hidden surfaces throughout the environment. To collect a glyph, players must shine their flashlight directly into the center of the spiral until the screen flickers.
These upgrades are divided into seven distinct categories, including Fix, Gun, War, Stuff, Aid, Action, and Lamp. Each category unlocks specific passive bonuses that enhance combat efficiency, health reserves, or resource management. Prioritizing survival upgrades early can make a substantial difference on higher difficulties.
Finding Words of Power in the Streets and Subway
The streets of the Dark Place hold several early-game glyphs that players can easily spot by following yellow arrows. Shining your light on walls near Draft Street, Caldera Street Station, and rooftop alleyways will reveal hidden symbols. Paying close attention to environmental hints ensures you do not miss vital early perks.
Descending into the subway system unveils additional upgrade opportunities tucked away in abandoned train cars and side rooms. Areas near Shrine Street Station and the Collapsed Tunnel host glyphs hidden behind wooden obstacles or under construction platforms. Thoroughly searching these subterranean paths provides a solid foundation before tackling larger story bosses.
Exploring Oceanview Hotel and Poet's Cinema
As Alan advances to the Oceanview Hotel, space becomes more confined, making glyphs trickier to locate. Search key areas such as the second-floor hallway, Room 224, and the ceiling above the ballroom bar. Finding these upgrades boosts overall utility right before entering high-intensity encounters.
The Poet's Cinema serves as another major hub containing powerful combat perks. Check the storage rooms behind the restrooms, the lobby balconies, and the upper rooftop areas near the water tank. Securing these final glyphs maximizes your character's combat builds for the late-game chapters.
Recommended Upgrade Priorities for Survival
Selecting the best upgrades depends heavily on your current playstyle and resource needs. Words of Fix provide direct enhancements to maximum health, ensuring higher survivability against aggressive shadow foes. Meanwhile, Words of Gun and War significantly boost weapon effectiveness and ammo efficiency.
For players focused on exploration, spending points on Words of Stuff helps reveal key items and map secrets. Balancing defensive perks with offensive upgrades creates a well-rounded character capable of tackling any darkness-infused challenge. Strategic allocation ensures your inventory and health stay optimized until the credits roll.

Far Cry 6 A Rising Tide Order And...
Navigating the various treasure hunts across Yara offers players valuable rewards and intriguing lore in Far Cry 6. Among these challenges, the A Rising Tide quest stands out due to its reliance on environmental clues scattered throughout a small coastal village. Players must interact with a set of named switches inside a locked stash house to gain access to a unique weapon.
Starting the A Rising Tide Quest
The A Rising Tide treasure hunt is situated in the Yarabi fishing village along the southern coast of Sierra Perdida. Upon arriving at the designated shack, reading the note posted outside triggers the start of the puzzle. Inside the building, you will notice five distinct switches, each corresponding to a legendary Yaran rebel.
Deciphering the Boat Puzzle Code
The standard method for solving this puzzle requires finding five named boats scattered around the immediate area. Each boat features a number or mathematical clue that indicates its sequence order. However, players seeking a faster resolution can find a burnt note hidden underneath the floorboards of the stash house itself. This note lists the exact order needed without requiring extensive exploration across the village.
The Correct Lever Sequence
To successfully unlock the room, activate the levers in a specific order: El Tigre del Mar first, followed by Papi Chulo, El Lucky, Clarita, and finally Roja Victoria. Pressing these buttons in the accurate order unlocks the electronic door mechanism inside the house. If an incorrect switch is pulled, you can reset the mechanism and try the sequence again.
Claiming Your Quest Rewards
Once the door unlocks, head inside to claim the contents of the hidden supply chest. Your primary reward for completing this hunt is the Camo Quinceañera unique rifle, along with extra experience points. Adding this weapon to your arsenal provides strong mid-range combat capabilities for future operations against Anton Castillo's forces.

Player Can't Join on Current Platform Siege Multiplayer...
Encountering party errors while trying to squad up in Rainbow Six Siege can quickly derail a gaming session with friends. The message indicating that a player cannot join a party on their current platform often pops up unexpectedly during crossplay attempts. Understanding why this error occurs and knowing the quick fixes can get your team back into matchmaking without hassle.
Understanding Crossplay Restrictions in Siege
The primary reason for party joining failures often stems from platform compatibility rules and crossplay configurations. Rainbow Six Siege features distinct matchmaking pools for console players and PC users to ensure fair competitive balance. If crossplay settings are mismatched or restricted on individual console privacy menus, the game blocks incoming squad invites automatically.
Toggling Crossplay Matchmaking Settings
One of the most reliable fixes involves resetting your crossplay connection directly inside the game settings. Navigate to the general options tab, switch crossplay matchmaking off, apply the changes, and then toggle it back on. This action forces your game client to refresh its link with the Ubisoft Connect servers and clear temporary party glitches.
Checking Ubisoft Account and Platform Linking
Unsynchronized account connections frequently cause multiplayer lobby errors across different systems. Ensure that your console profile is correctly linked to your primary Ubisoft account before sending squad invites. For additional support and connection guides, you can visit to review network recommendations.
Clearing Cache and Restarting Game Services
Corrupted temporary cache files on your console or PC can interfere with live matchmaking updates. Restarting your gaming system and cycling your home router helps eliminate persistent IP configuration issues. Console users should also consider clearing system cache to guarantee smooth communication with multiplayer servers.

Player Can't Join on Current Platform Siege Multiplayer...
Encountering party errors while trying to squad up in Rainbow Six Siege can quickly derail a gaming session with friends. The message indicating that a player cannot join a party on their current platform often pops up unexpectedly during crossplay attempts. Understanding why this error occurs and knowing the quick fixes can get your team back into matchmaking without hassle.
Understanding Crossplay Restrictions in Siege
The primary reason for party joining failures often stems from platform compatibility rules and crossplay configurations. Rainbow Six Siege features distinct matchmaking pools for console players and PC users to ensure fair competitive balance. If crossplay settings are mismatched or restricted on individual console privacy menus, the game blocks incoming squad invites automatically.
Toggling Crossplay Matchmaking Settings
One of the most reliable fixes involves resetting your crossplay connection directly inside the game settings. Navigate to the general options tab, switch crossplay matchmaking off, apply the changes, and then toggle it back on. This action forces your game client to refresh its link with the Ubisoft Connect servers and clear temporary party glitches.
Checking Ubisoft Account and Platform Linking
Unsynchronized account connections frequently cause multiplayer lobby errors across different systems. Ensure that your console profile is correctly linked to your primary Ubisoft account before sending squad invites. For additional support and connection guides, you can visit to review network recommendations.
Clearing Cache and Restarting Game Services
Corrupted temporary cache files on your console or PC can interfere with live matchmaking updates. Restarting your gaming system and cycling your home router helps eliminate persistent IP configuration issues. Console users should also consider clearing system cache to guarantee smooth communication with multiplayer servers.

Stardew Valley What to Do: Best Activities for...
Starting a new farm in Pelican Town can feel overwhelming due to the sheer volume of choices available from day one. Beginners often find themselves balancing energy limits, tight budgets, and unfamiliar mechanics during their first spring. Focus on core daily routines that establish steady income while introducing the game's essential features.
Mastering Basic Crop Management and Foraging
Planting fast-growing crops like parsnips and radishes provides reliable early revenue and helps level up your farming skill quickly. Watering your crops early each morning ensures they grow efficiently without wasting daylight hours. Combining farming with daily foraging around the forest and mountain areas supplies extra energy snacks and easy funds.
Foraging wild plants requires zero initial gold investment, making it one of the safest early-game activities for beginners. Gathering berries, daffodils, and leeks also helps clear space while exploring the surrounding valley layout. Stashing a few wild items in a chest ensures you have gifts ready for town residents later on.
Exploring the Mines for Essential Crafting Ore
Heading into the local mines unlocks critical crafting materials like copper and iron needed for tool upgrades. Descending through elevator checkpoints every five floors saves progress and makes future mining runs much easier. Defeating basic monsters along the way yields valuable loot while increasing your combat proficiency.
Upgrading your watering can and pickaxe at the blacksmith should be a top priority during your first month. Upgraded tools reduce energy consumption significantly, leaving more stamina for evening exploration or fishing trips. Collecting quartz and earth crystals also helps unlock early crafting recipes for sprinklers and chests.
Building Relationships and Unlocking the Community Center
Interacting with Pelican Town residents helps build valuable friendships that result in helpful recipes sent directly to your mailbox. Attending seasonal festivals allows you to participate in mini-games and purchase exclusive items from specialized vendors. Learning each villager's preferred gifts speeds up friendship progression over time.
Restoring the local Community Center serves as the primary guidance system for new players learning different game mechanics. Completing various seasonal bundles rewards you with unique items, seeds, and permanent map shortcuts. Focusing on bundle requirements ensures you experience farming, fishing, and foraging in equal measure.
Establishing a Relaxing Fishing Routine
Casting a line in the ocean, river, or mountain lake offers a lucrative way to earn gold during rainy days. Fishing requires practice to master the movement bar, but higher skill levels make the activity far easier. Selling your daily catch provides immediate cash flow for buying seasonal seeds in bulk.
Different fish species appear depending on the current season, time of day, and weather conditions across Pelican Town. Keeping a few high-quality fish for cooking recipes or bundle turn-ins provides long-term progression benefits. Pacing yourself through these initial goals creates a smooth, rewarding transition into a thriving farm owner.

Swarm of Flies Elden Ring Location and How...
Navigating the treacherous subterranean zones in Elden Ring often leads players to discover powerful incantations that drastically alter combat strategies. Among these, the Swarm of Flies incantation stands out as a devastating Blood Oath spell capable of inflicting rapid Hemorrhage build-up on targets. Understanding where to find this item and how to handle the hostile creatures guarding it can save Tarnished adventurers considerable time and effort.
Where to Find the Swarm of Flies Incantation
The Swarm of Flies incantation is located within the gloomy underground region known as Mohgwyn Palace. To reach this zone, players must use the direct portal situated in the western Mountaintops of the Giants or follow White-Mask Varre's questline to gain early access. Once inside, adventurers should proceed toward the blood-filled marsh area situated north of the Palace Approach Ledge-Road Site of Grace.
While exploring the eastern cliffs of the blood swamp, players will encounter a shallow cave guarded by several resting Sanguine Noble enemies and albinaurics. The incantation itself rests on a corpse located at the far back of this small cavern. Careful navigation around the perimeter wall allows players to snatch the item quickly without drawing excessive attention from nearby threats.
How to Defeat Enemies Guarding the Cave
The cave holding the spell is inhabited by blood-crazed albinaurics that rely on swift physical strikes and rapid bleed buildup. Engaging these targets one by one using ranged attacks or heavy staggering weapons is the safest strategy to clear the path. Area-of-effect spells or heavy weapons with wide swing arcs allow players to clear the tight interior space without getting cornered.
For players struggling with the aggressive creatures in the swamp, using Torrent to ride swiftly past the enemies is a viable alternative tactic. Once inside the narrow cave, players can grab the loot quickly before mounting up again to escape the blood marsh safely. Maintaining high robust defense gear also mitigates the risk of sudden blood loss triggers while fighting inside.
Best Strategies for Using Swarm of Flies
Once acquired, Swarm of Flies serves as an exceptionally potent offensive tool for players building around Faith and Arcane statistics. The spell releases a tracking cloud of bloodflies that constantly ticks physical damage while rapidly building up the target's Hemorrhage meter. Its ability to be cast while walking or moving makes it an ideal option for maintaining pressure during intense encounters.
In both player-versus-environment encounters and player-versus-player duels, this incantation creates momentary stagger windows that disrupt enemy attacks. Combining Swarm of Flies with melee bleed weapons allows players to trigger massive burst damage in rapid succession against tough bosses. Proper positioning ensures the slow-moving swarm fully connects with moving targets for maximum effect.

Mazda RX8 Fast And Furious And Its Place...
The Fast and Furious franchise is renowned for elevating JDM sports cars into global pop culture icons. While vehicles like the Nissan Skyline GT-R and Toyota Supra often steal the spotlight, the Mazda RX-8 holds a uniquely memorable position in cinematic car culture. Featured prominently in The Fast and the Furious: Tokyo Drift, this distinct rotary-powered coupe showcased a fresh era of tuner aesthetics.
The Mazda RX-8 Arrival in Tokyo Drift
In Tokyo Drift, the Mazda RX-8 made a striking impression as the signature drive of Neela, played by Nathalie Kelley. Outfitted with a eye-catching blue and black two-tone paint scheme and a VeilSide D1-GT body kit, the car perfectly embodied the elevated style of Tokyo's underground drift scene. Its sleek lines and distinctive rear freestyle doors made it stand out immediately among the custom builds featured throughout the film.
Underneath the custom bodywork, the movie car was tuned to reflect authentic Japanese drifting culture. Upgrades included a GReddy turbocharger setup, lowered suspension components, and wide custom wheels designed for aggressive sideways action. These modifications transformed the balanced factory platform into a specialized visual and performance showcase for film audiences worldwide.
Standing Out in the Shadow of the RX-7
Replacing an iconic predecessor like the Mazda RX-7 FD was no small task for both Mazda and the filmmakers. While the RX-7 gained legendary status under Han's ownership in the same film, the RX-8 carved out its own unique identity. It presented a more modern, sophisticated approach to Japanese sports car design during the mid-2000s.
The inclusion of the Renesis naturally aspirated rotary engine gave the vehicle a smooth, high-revving character that appealed to automotive enthusiasts. Although it lacked the raw twin-turbo power of the older RX-7, its balanced handling dynamics made it a natural fit for technical drift courses. By showcasing both generations side by side, the film highlighted the evolution of Mazda's rotary heritage.
Impact on Modern Tuner Culture
The exposure from Tokyo Drift provided the Mazda RX-8 with a lasting legacy among car enthusiasts and collectors. Following the movie's release, aftermarket demand grew for VeilSide body kits and rotary performance upgrades inspired by Neela's build. It proved that non-traditional sports coupes could hold their own in major action blockbusters.
Today, fans still celebrate the movie car as one of the most underrated vehicles in the entire franchise. Its appearance inspired a generation of builders to appreciate the unique engineering and aesthetic potential of the RX-8 platform. Decades after its silver screen debut, the car remains an enduring symbol of 2000s tuner nostalgia and movie history.
Disney Dreamlight Valley Vegetarian Pizza Recipe And Ingredients
Cooking is a central activity in Disney Dreamlight Valley, providing players with ways to restore energy, fulfill various character duties, and unlock delightful virtual meals. Among the many star-rated culinary creations available, baking a Vegetarian Pizza is an excellent way to use the diverse crops harvested from your valley biomes. This five-star recipe requires a specific combination of garden-fresh elements that can easily be obtained as you expand your magical village.
The Essential Ingredients for Vegetarian Pizza
To successfully prepare a Vegetarian Pizza in your virtual kitchen, you will need to gather five distinct ingredients. The required components are two any vegetables, one tomato, one cheese, and one wheat. Combining these specific items at any cooking station ensures that your efforts result in a perfect five-star meal instead of a basic flatbread.
For the flexible vegetable slots, players often choose easily accessible options like carrots, onions, or bell peppers found in early-game regions. Tomatoes and wheat can be grown from seeds purchased at Goofy's Stalls, while cheese must be bought directly from Remy's pantry inside the Chez Remy restaurant.
How to Source and Harvest Your Materials
Sourcing your ingredients efficiently requires unlocking a few key biomes across the valley layout. Wheat seeds are available almost immediately in the Peaceful Meadow, making them the easiest component to secure for your baking needs. Tomato seeds can be purchased once you gain access to the Dazzle Beach biome and repair the local stall.
The dairy component requires a bit of progression through Remy's realm questline to bring the talented chef back to the village. Once his restaurant is established, you can buy unlimited quantities of cheese to complete your savory toppings. Cultivating your own crops is a great way to build up an inventory of fresh produce for complex cooking adventures.
Maximizing Energy and Friendship Rewards
Cooking a five-star meal like the Vegetarian Pizza offers significant gameplay advantages beyond simply filling your inventory slots. Consuming this hearty dish provides a substantial boost to your character's stamina, helping you sprint faster and perform daily tasks more efficiently. It is also an ideal item to gift to village residents who list it as their favorite thing of the day.
Serving this delicious pizza at Chez Remy will also reward you with valuable star coins and increased friendship points with whoever ordered it. Mastering these various kitchen mechanics helps you progress smoothly through the storyline while enjoying a cozy simulation experience.

Ancestors The Humankind Odyssey Guide To Survival And...
Embarking on a journey through prehistoric Africa in Ancestors The Humankind Odyssey requires players to shed modern assumptions and embrace raw primal instincts. This unique survival game challenges you to lead a clan of early hominids across millions of years of evolutionary history. Success depends entirely on your willingness to experiment with the environment, overcome systemic fear, and pass vital knowledge down to subsequent generations.
Mastering the Fundamentals of Early Survival
The initial hours in the jungle are notoriously unforgiving as you learn to manage basic biological needs like hunger, thirst, and exhaustion. Identifying safe food sources and clean drinking water is your first major priority before attempting wider exploration. You must also learn to interpret environmental audio cues to avoid deadly predators lurking in the dense undercanopy.
Using the senses of smell and intelligence allows your hominid to identify unknown objects scattered across the landscape. Once an item is recognized, altering your physical posture and grip opens up entirely new mechanics for tool manipulation. Constantly scanning your surroundings ensures your clan remains healthy and well-fed during early nomadic movements.
The Mechanics of Neurological Development
Every action your clan performs generates neuronal energy, which serves as the primary currency for unlocking advanced capabilities and physical attributes. Walking on two legs, grooming your companions, and processing complex materials all contribute to expanding your brain network. This neural growth directly translates into improved dexterity, better communication skills, and advanced sensory perception for your family group.
To protect your hard-earned progress, you must actively form stable pairs within the clan and raise healthy offspring. Bringing children along during your daily foraging expeditions allows them to witness your actions and absorb vital experiential knowledge. This process ensures that structural neuronal connections can be permanently locked in place before shifting your timeline forward.
Navigating the Evolutionary Timeline
Passing your generational knowledge forward requires initiating a controlled temporal leap, which matures your children and advances the clan's lineage. During this transition, standard skills are consolidated while random genetic mutations can spontaneously surface among new births. These unique evolutionary breakthroughs are essential for unlocking specialized survival traits that help your species adapt to harsher biomes.
When your lineage accumulates enough scientific achievements, you can trigger a massive evolutionary leap spanning hundreds of thousands of years. This milestone evaluates your progress against real-world anthropological discoveries to determine if you are evolving faster than history. Successfully evolving transforms your physical appearance and unlocks entirely new hominid classifications better suited for global expansion.
Expanding Beyond the Comfort of the Jungle
As your clan grows more capable, the familiar canopy of the jungle must eventually be traded for the open risks of the savannah and wetlands. Each new territory introduces unfamiliar predatory threats and dynamic weather patterns that challenge your established survival routines. Adapting to these diverse biomes requires utilizing advanced weaponry, cooperative hunting strategies, and a willingness to establish secondary settlements across Africa.

Berry Avenue Codes for Pictures and Creative Customization...
Berry Avenue remains one of the most vibrant roleplay destinations in the Roblox universe, offering players an incredible canvas for personal expression and social storytelling. While the game provides an excellent selection of default assets, mastering custom image identifiers unlocks entirely new layers of realism for your virtual homes and spaces. Integrating these unique graphic components allows design enthusiasts to transition away from basic templates and construct highly personalized environments.
The Mechanics of Custom Graphic Integration
To implement custom images on walls, posters, or electronic devices within the game, players must utilize specific numerical asset identifiers sourced from the platform's library. These configuration keys allow you to bypass standard catalog restrictions and introduce highly specific visual themes into your personal plots. Ensuring you have the correct format is essential for seamless rendering during active gameplay sessions.
Many design communities actively curate and update collections of these visual keys to reflect shifting structural and aesthetic trends. By carefully selecting your image assets, you can establish cohesive color stories that tie an entire virtual property together seamlessly. Experimenting with different asset placements can dramatically alter the spatial perception of your favorite hangout spots.
Creative Layout Strategies for Modern Homes
Transforming a standard residential layout into a customized masterpiece requires a strategic approach to decoration and surface scaling. Utilizing themed wall art, faux windows with scenic backdrops, and custom television displays can make any standard living space feel instantly lived-in and authentic. For instance, incorporating realistic textures or seasonal graphics can turn a simple room into a cozy retreat.
Advanced decorators often combine custom graphics with clever furniture layering to mimic high-end architectural concepts. Placing dynamic canvases behind minimalist shelving units or using custom frames creates depth that immediately captures the eye during roleplay. These subtle adjustments distinguish novice builds from highly detailed community showpieces.
Sourcing Visual Assets and Staying Updated
Finding the perfect imagery for your virtual spaces involves exploring dedicated player forums and public design repositories. Because the platform continuously updates its content monitoring policies, active codes can occasionally shift or become unavailable over time. Engaging with active design groups ensures you retain access to fresh, working visual elements as they emerge.
Many creators share their favorite asset combinations on popular social platforms, offering inspiration for seasonal makeovers and thematic overhauls. Saving your preferred identification sequences in an external document can streamline future construction projects significantly. Sharing your own discoveries within the community further enriches the shared creative ecosystem of the platform.
disney dreamlight valley smoked peanuts and anglerfish Recipe...
Disney Dreamlight Valley offers players a delightful culinary journey filled with diverse ingredients and complex recipes to discover. Cooking plays an essential role in restoring your avatar's energy, completing friendship quests, and earning Star Coins at Goofy's Stalls. Among the many unique dishes you can prepare, mastering specific high-tier meals can significantly boost your progression throughout the magical village.
Understanding the Culinary Value of High Tier Seafood
Anglerfish is widely considered one of the rarest aquatic resources available to players exploring the valley's distinct biomes. This deep-sea creature provides an exceptional amount of energy when consumed or used as a core component in complex cooking recipes. Successfully catching this rare fish requires a solid strategy and access to specific late-game areas within the valley map.
To locate the elusive creature, players must focus their fishing efforts exclusively on the Forgotten Lands biome during nighttime hours. Look for rare orange ripples in the water ponds, as these specific spawning points offer the only reliable way to hook this valuable marine ingredient. Bringing along a fishing companion will also double your yield, allowing you to build up a substantial inventory for your future cooking projects.
Unlocking and Sourcing Smoked Peanuts
Peanuts add a savory and distinct texture to many specialized meals, but they cannot be found growing wild in the valley's open fields. Instead, players must advance their friendship level with Remy and complete his restaurant upgrade objectives to make them available. Once his culinary establishment is fully operational, you can purchase unlimited bags of this ingredient directly from the pantry shelf.
Combining these specialized shelf ingredients with rare fish allows village chefs to craft sophisticated multi-star meals that satisfy demanding residents. Utilizing the stovetop station inside your home or Chez Remy ensures you can experiment safely with different combinations without wasting your hard-earned resources. Keeping a steady supply of both purchased goods and forged items ensures you are always prepared for any upcoming culinary challenge.
Step by Step Cooking and Preparation Guide
Executing specialized seafood recipes demands careful attention to ingredient slots to avoid accidentally creating an unhelpful generic meal instead. To start the process, interact with any functional cooking station and ensure you have a single piece of coal ready to light the fire. Carefully place your harvested anglerfish and prepared peanuts into the pot along with any required complementary herbs or vegetables specified by the recipe book.
The culinary arts system in Disney Dreamlight Valley rewards players who take the time to log and memorize complex ingredient pairings. Successfully creating high-tier seafood platters unlocks permanent entries in your collection menu, making it easier to autofill components during busy gameplay sessions. These premium dishes are perfect for gifting to iconic Disney NPCs to maximize your daily friendship growth parameters efficiently.

Miracle Pickaxe Polish Dreamlight Valley Recipe and Materials
Mining resources forms the backbone of progression in Disney Dreamlight Valley, allowing players to craft structures, complete character quests, and accumulate wealth. To maximize efficiency while gathering rare materials, players can utilize magical temporary enchantments that upgrade their tools. The Miracle Pickaxe Polish stands out as a highly sought-after potion that significantly increases the drop rate of valuable gems from mining nodes across the valley.
Required Crafting Recipe Materials
To craft this powerful enhancement, you must gather specialized ingredients at a crafting station. The recipe demands ten Vitalys Crystals, five Onyx, and five hundred Dreamlight to combine successfully. Vitalys Crystals are harvested exclusively from the mining nodes inside the Vitalys Mines located within the Sunlit Plateau biome.
Onyx can be randomly discovered by mining any rock spot throughout the entire map, making it a rare byproduct of regular exploration. Finally, Dreamlight is accumulated by completing daily duties, clearing night thorns, and hitting milestone achievements in your journal. Once all components are secured, players can interact with any crafting bench under the potion and enchantment tab to create the polish.
How the Miracle Pickaxe Polish Functions
When you apply this elixir from your inventory, your Royal Pickaxe becomes charged with a temporary magical boost. The enchantment guarantees that the next twelve mining nodes you strike will yield additional valuable gems alongside standard stone and coal. This effect removes a large portion of the randomness typically associated with hunting for rare minerals.
It is important to note that the polish affects how many items drop rather than choosing the exact type of gem you receive. The specific drops will still depend heavily on the biome you are currently mining in, meaning players should plan their route carefully before activating the buff. Bringing a high-level mining companion along while the potion is active will further multiply your resource yields.
Best Biomes for Mining Efficiency
To get the most out of your freshly brewed potion, you should focus your efforts on biomes that contain high-value gems. The Forgotten Lands and the Vitalys Mines are premier locations due to their inclusion of expensive diamonds, rubies, and sapphires. Activating your polish right before clearing a full circuit of these high-yield areas ensures maximum financial returns and quest progression.
Some players prefer saving their active charges for specific character requests that demand a large quantity of a single gem type. If you have prepared your realm properly by clear-cutting obstructing pathways, you can run a rapid loop through multiple biomes before the enchantment runs out. Utilizing this strategic approach turns an ordinary mining trip into a highly lucrative harvesting session.

Art Of Rally Trophy Guide And Completion Tips
The beautifully stylized racing game Art of Rally offers achievements that require excellent timing and strategic track choices. Conquering the game's achievement list takes players on a journey through the golden era of vintage off-road racing, testing their abilities on various demanding terrains. Achieving total completion requires patience and a deep understanding of unique handling mechanics designed for specialized vehicles.
Mastering Handling and Driving Techniques
To secure the toughest racing achievements, players must move away from standard arcade habits and learn vehicle weight transfer. Perfecting advanced mechanics like the Scandinavian flick allows drivers to maintain high speeds through acute corners without losing control. Managing the throttle smoothly during sudden slides ensures the vehicle exits tricky hairpins without spinning out.
Consistency across multiple stages is far more valuable than setting a single risky track record. Practicing on identical stages allows drivers to understand how different surfaces like gravel and snow affect braking distances. Keeping a steady rhythm helps prevent catastrophic crashes that can quickly ruin a perfect championship run.
Hunting Down Hidden Open World Collectibles
Outside of intense stage racing, the game features expansive free-roam areas filled with unique collectible items. Tracking down every single hidden object requires exploring deep valleys, remote mountain paths, and tight corners across multiple regional maps. Players should systematically check around large structures and natural landmarks to avoid missing any hidden secrets.
Completing these exploration challenges rewards players with unique cosmetic unlocks and crucial milestone achievements. Taking a break from the stressful main career mode to explore at a slower pace is a great way to enjoy the scenery. This thorough exploration serves as an excellent foundation for earning a 100 percent completion rating.
Beating the Master AI and Leaderboard Times
The final hurdle for most trophy hunters involves defeating the highly competitive Master AI settings in championship events. This difficult digital opponent does not change its behavior based on your current performance, as it uses real leaderboard times to set a strict pace. Drivers must minimize small mistakes and maintain an optimal racing line to stay ahead of these aggressive target times.
Choosing specific vehicles that match your personal driving preferences can make a massive difference in your final standings. Some players excel with stable all-wheel-drive cars, while others find success using agile rear-wheel-drive models. Dedicating time to specific time trials will help refine your approach until those final gold rewards are safely secured.

Elden Ring Mountaintop Of The Giants Guide And...
The Mountaintop of the Giants stands as one of the most perilous endgame zones in Elden Ring, challenging players with harsh snowy environments and incredibly fierce enemies. Reaching this frozen plateau requires travelers to defeat Morgott the Omen King in Leyndell and secure the Rold Medallion to activate the Grand Lift. Once ascended, adventurers will discover a massive landscape split into distinct eastern and western sections filled with unique secrets and crucial progression items.
Navigating the Main Highway and Ancient Ruins
Upon leaving the Grand Lift of Rold, the primary path leads players along a narrow, treacherous ridge guarded by formidable adversaries. Following this snowy road northward guides you toward the Zamor Ruins, where players can uncover powerful incantations and high-tier smithing materials hidden beneath the frost. Navigating this initial zone carefully ensures that you gather essential defensive items before pushing deeper into the freezing wilderness.
Further along the eastern trail lies the massive Freezing Lake, an expansive open area known for low visibility and sudden boss encounters. Travelers can find a crucial Site of Grace near the shoreline to secure their progress after surviving the initial frozen valley. Exploring the perimeter of the lake reveals hidden pathways that ascend toward the higher plateaus where ancient monolithic structures still stand intact.
Key Locations and Essential Sites of Grace
Central to your exploration is the Church of the Repose, located far to the south across a massive chain bridge. This holy site holds great significance for completionists because it triggers a dramatic NPC invasion that rewards victorious players with powerful unique weapons. Resting at this specific sanctuary also prepares your character for the grueling combat encounters waiting on the peak nearby.
Another vital landmark is the Castle Sol fortress situated on the northernmost edge of the snowy mountain range. Conquering this heavily fortified compound is necessary for players who wish to retrieve half of the Haligtree Secret Medallion. Overcoming the resident spectral commanders within these walls unlocks access to the hidden western snowfields where even greater mysteries reside.
The Final Ascent and the Fire Giant
Before concluding your journey through this frozen tundra, you must cross the massive iron chains leading toward the Flame Peak. This volcanic summit serves as the final staging ground for the main story progression within the northeastern territory. Players should finalize their equipment upgrades and distribute their healing flasks strategically before stepping onto the final battlefield.
At the highest point stands the legendary Fire Giant, a massive boss that tests your endurance and situational awareness. Defeating this colossal guardian grants access to the Forge of the Giants, allowing you to trigger a pivotal narrative event that alters the state of the Lands Between. Managing this monumental triumph successfully opens the pathway to the final legacy dungeons of the game.

How to Wirelessly Connect PS4 Controller to PC...
Pairing your favorite console gamepad with a desktop computer completely shifts the dynamic of modern computer gaming. While standard USB cables offer a simple plug-and-play experience, transitioning to a wireless environment provides unmatched movement freedom during intense gameplay sessions. This guide will walk you through the essential steps needed to establish a stable wireless connection between your hardware components.
Preparing Your Windows Operating System
Before initiating the wireless synchronization process, you must ensure that your computer has an active internal or external Bluetooth receiver. Navigate to your operating system settings panel and verify that the wireless communication toggle is switched to the active position. Keeping your system drivers updated beforehand minimizes potential communication errors between the hardware devices.
Activating Controller Pairing Mode
Your hardware must be placed into a discoverable state before it can broadcast its presence to nearby desktop systems. To achieve this, simultaneously press and hold the central PlayStation button and the small Share button located on the upper left side. Continue holding both buttons for approximately five seconds until the front light bar begins flashing rapidly in a rhythmic pattern.
Completing the Desktop Connection
Once the gamepad is actively flashing, open the device management panel on your computer and select the option to add a new wireless device. The system will scan the immediate area and display the peripheral as a generic input device within the discovery list. Click on the corresponding name to finalize the digital handshake and stabilize the wireless connection.
Optimizing Performance and Mapping
Some native operating system applications might require specialized configuration tools to accurately recognize the specific inputs of a console gamepad. Utilizing comprehensive gaming libraries or dedicated third-party mapping software can help translate the inputs seamlessly for older computer titles. Testing your joysticks and triggers within an active test application ensures optimal responsiveness before launching your primary game.

Mario Odyssey Ruined Kingdom Moons Guide to Every...
Super Mario Odyssey takes players on an extraordinary journey across diverse worlds, but few locations match the dramatic atmosphere of Crumbleden. Known as the Ruined Kingdom, this dark, stormy realm serves as the backdrop for a massive confrontation against the Lord of Lightning. While it is one of the smallest kingdoms in the game, it still hides several valuable collectibles for completionists to discover. This guide will help you track down every single Power Moon hidden within this desolate, ancient landscape.
Defeating the Ruined Dragon and Story Moons
Your first major milestone in this region requires confronting the massive dragon that blocks your progression. Defeating this impressive boss yields the primary Power Moon, which restores power to the Odyssey and allows you to travel to the next destination. Once the beast is pacified, you can easily walk onto its head to claim your hard-earned prize. Collecting this initial narrative item also unlocks the ability to explore the remaining parts of the map safely.
After the primary battle concluded, additional environmental interactions become available around the main arena. For instance, players can notice several glowing spots on the ground where the dragon once rested. Ground pounding these specific areas will uncover hidden rewards that are easy to miss if you rush past them. Take your time to thoroughly investigate the cracked stone platform before moving back toward the Odyssey.
Uncovering Hidden Chests and Shiny Secrets
Beyond the main boss platform, looking around the crumbling architecture reveals hidden pathways tucked away from the main road. If you drop down to the lower ledges near the starting area, you will find a hidden alcove containing an ancient treasure chest. Opening this container rewards players with another vital collectible, proving that exploration is highly encouraged. You can use the local internet to find video tutorials if you want to see detailed routes for these tricky jumps.
Another secret requires a keen eye for unusual visual elements in the environment. A distinct glowing spot can be found high up on the stone pillars near the main staircase. Players must utilize Mario's advanced jumping techniques or precise Cappy throws to reach these elevated areas. Striking the glowing element will instantly release the hidden moon for you to collect.
Mastering the Ruined Kingdom Moon Rock Challenges
Once you complete the main story of the game, returning to this dark realm unlocks even more challenges via the Moon Rock. Striking this massive artifact scatters new items across the map, including a few incredibly difficult platforming trials. One of these challenges requires navigating a specialized 2D pixel segment hidden inside the ancient walls. Precision jumping is absolutely mandatory here as a single mistake will force you to restart the section.
The final set of collectibles involves mastering the local capture mechanics to reach far-off platforms. Players must take control of a specific spark pylon to travel across the stormy sky toward a distant, isolated island. Timing your release perfectly ensures you land safely on the small platform rather than falling into the abyss below. Clearing these post-game challenges completes your collection checklist and guarantees total mastery over the realm.

Best Open World Multiplayer Games To Play
Exploring vast digital landscapes becomes an entirely different experience when shared with friends or online communities. Unlike traditional single-player adventures, these games invite players to dive into sprawling universes where coordination and exploration go hand in hand. Finding the right virtual sandbox can provide hundreds of hours of collaborative entertainment and memorable emergent moments.
The Evolution of Shared Sandbox Worlds
Modern gaming technology allows developers to build seamless persistent environments that host thousands of players simultaneously. These massive spaces encourage organic player interactions, ranging from cooperative trading networks to intense faction-based territorial wars. As server stability continues to improve, the depth of mechanical freedom within these digital boundaries expands exponentially.
Players frequently look for titles that balance structured quest lines with total environmental freedom. The finest examples in this genre allow your group to ignore the primary narrative entirely to forge an independent path. This structural flexibility ensures that every gameplay session feels distinct and tailored to your current team dynamics.
Surviving the Elements with a Squad
Cooperative survival mechanics represent one of the most popular implementations of open-world multiplayer design. Dropping into an unforgiving environment forces groups to allocate resources efficiently, divide labor, and construct secure defensive bases. The constant tension of environmental hazards combined with resource scarcity creates a compelling loop that rewards strategic communication.
Many of these experiences rely heavily on crafting systems where players specialize in distinct roles like blacksmithing, farming, or tactical defense. This interdependency strengthens community bonds and gives every individual a clear sense of purpose within the larger group. Overcoming a severe weather cycle or a massive enemy raid together provides unmatched mechanical satisfaction.
Massive Roleplaying and Narrative Universes
For gamers seeking deep lore and long-term character progression, traditional massively multiplayer online role-playing games offer the ultimate sandbox destination. These titles feature meticulous world-building, complex economic systems, and monumental endgame challenges that require dozens of coordinated participants. Engaging with these virtual societies provides a sense of scale that smaller multiplayer match formats simply cannot match.
Navigating these expansive maps typically reveals hidden dungeons, rare world bosses, and collaborative community hubs. The continuous post-launch updates provided by dedicated developers ensure that these environments evolve steadily over multiple calendar years. Committing to a shared narrative universe allows your squad to grow alongside a living digital ecosystem.
Action and Vehicular Exploration Sandboxes
Beyond traditional high-fantasy settings, the genre also features spectacular modern landscapes driven by high-octane action and vehicular freedom. Players can form criminal syndicates, organize massive street races, or execute complex tactical heists across highly detailed urban corridors. These environments emphasize physics-based chaos and rapid traversal mechanics to keep the adrenaline levels consistently high.
The addition of shared civilian traffic, dynamic weather systems, and reactive police artificial intelligence makes these worlds feel incredibly vibrant. Gathering your crew for a cross-country drive or a synchronized airborne insertion provides pure arcade fun. These action-heavy playgrounds remain highly accessible options for groups looking for immediate entertainment without intense grinding requirements.

How to Use Mods in Fallout 4
The post-apocalyptic landscape of the Commonwealth offers a massive playground for customization, but integrating community creations elevates this experience significantly. Transforming your journey through Bethesda's nuclear wasteland involves understanding how different platforms handle user-generated content safely. Utilizing specialized add-ons allows you to reshape everything from gameplay mechanics to visual fidelity to suit your personal style perfectly.
Understanding the Built In Modification Menu
The most straightforward method to alter your experience is using the official built-in portal on your main screen. This platform allows both console and PC users to browse, download, and install creations safely without touching system files. Players simply need to create a free Bethesda account to unlock immediate access to thousands of approved assets.
Once inside the designated menu, you can sort options by popularity, category, or structural changes. Selecting a specific item displays its storage size and a comprehensive description of its internal features. After downloading your chosen additions, the internal script engine manages your background assets automatically during startup.
Utilizing Third Party Managers for PC Gameplay
Advanced enthusiasts playing on computers generally prefer using community-created platforms for complex setups. Utilizing a external framework grants complete control over individual file overrides and comprehensive structural scripts. This flexibility ensures that vast setups containing hundreds of adjustments remain completely stable over long play sessions.
Before installing complex creations, adjusting your local initialization configuration files is essential to allow external loading. This simple change unlocks complete compatibility for deep mechanical overhauls and customized textures that standard portals cannot handle. Most veteran players recommend using established community platforms to track updates and prevent unexpected game crashes.
Managing Load Order to Prevent Crashes
The sequential arrangement of your active assets fundamentally determines how different alterations interact with each other inside the core engine. When multiple additions attempt to overwrite the same in-game resource, the asset placed lowest in your sequence takes priority. Organizing this layout correctly prevents game bugs and sudden dashboard drops during heavy combat encounters.
Generally, massive structural adjustments and fundamental framework scripts should always sit near the top of your list. Smaller visual additions, individual weapons, and targeted crafting recipes perform best when loaded further down. Paying close attention to developer recommendations regarding structural sequencing guarantees a smooth and immersive exploration journey.
The Risks and Rewards of Game Alterations
Diving into community adjustments introduces a massive variety of fresh quests, detailed armor options, and improved survival parameters. These elements provide incredible replay value that transforms the classic Boston map into an entirely new experience. However, adding extensive scripts can occasionally disable achievements and impact overall frame rates on older hardware platforms.
Creating backup saves before testing major changes ensures your long-term progression remains completely safe from data corruption. If you experience performance issues, systematically disabling recent downloads will pinpoint conflicting files quickly. Balancing custom additions responsibly allows you to maximize your enjoyment while preserving the integrity of your adventure.

God of War Ragnarok Hel Tears Locations
In God of War Ragnarok, closing dimensional rifts is a crucial endeavor to restore order across the Nine Realms. The Hel Tears manifest as icy tears spilling frost-based enemies into various regions following major story events in Helheim. Sealing all six rift locations completes the Hel to Pay Favor, rewarding players with valuable frozen sparks and essential upgrading resources for Atreus and Kratos.
Story-Mandatory Hel Tear Encounters
The first two Hel Tears are encountered naturally as you progress through the main storyline mission Reunion. The initial rift opens at Sindri's House, introducing the defense mechanic where Atreus must seal the tear while Kratos fights off waves of invading foes. Completing this combat section automatically triggers the overarching side quest to locate and seal the remaining breaches.
Shortly after the encounter at the house, a second tear must be sealed during your journey through Helheim in the Gleaming Bale region. Because this rift is part of the central path, players cannot miss it while advancing the campaign. Defending Atreus here establishes the pattern required for all subsequent encounters across the realms.
Finding Tears in Midgard and Svartalfheim
Navigating to the realm of Svartalfheim leads players to a rift hidden within the Aurvangar Wetlands. You can reach this spot by taking a boat through the southern channels toward a small beach landing. Defeating the high-level Hel-walkers in this marshy terrain requires quick crowd control and effective use of runic attacks.
In Midgard, another dimensional rift lies waiting in the Well of Urd area located near the northwestern reaches of the map. Traversing the snowy cliffs allows Kratos to spot the glowing blue anomaly resting in a narrow canyon pass. Preparing high-damage area-of-effect abilities helps clear the defensive waves efficiently while Atreus works on closing the gap.
Uncovering Rifts in Alfheim and Vanaheim
Journeying through Alfheim brings players to a Hel Tear situated near The Strond region along the path leading toward the Temple of Light. This location features aggressive Hel-archers and heavy foes that attempt to interrupt the sealing process. Maintaining situational awareness and prioritizing ranged threats ensures Atreus remains undisturbed while closing the breach.
The final rift resides deep within Vanaheim near The Southern Wilds riverbank area. Navigating the dense foliage brings you face-to-face with tough enemies capable of inflicting severe frost status effects. Successfully defending this point completes the quest objectives, yielding rare crafting materials necessary for maximizing gear performance.
Rewards and Combat Tips for Closing Rifts
Every closed tear yields a Frozen Spark, six of which combine to form a full Frozen Flame used to upgrade the Leviathan Axe. Beyond weapon upgrades, players receive substantial experience points and realm-specific resources that aid end-game preparation. Equipping armor sets that boost defense against frost damage significantly simplifies these timed horde battles.
To handle the relentless enemy spawns, focus on keeping foes away from Atreus using shield bashes and heavy Spartan Rage attacks. Utilizing elemental synergy by freezing or burning targets keeps the battlefield controlled throughout each sixty-second timer. Sealing every single rift ensures full completion of the realm maps and brings Kratos closer to total mastery over the Nine Realms.

Arc Raiders Broken Monument Quest and Location Guide
Embarking on early missions in Arc Raiders requires players to thoroughly explore treacherous landscapes while gathering sentimental historical artifacts. The Broken Monument quest stands out as a foundational trial that shifts your focus from basic mechanical scavenging to deep environmental tracking. Successfully completing this objective demands careful navigation around hostile zones and a keen eye for hidden containers.
Navigating to the Search Zone
To begin this quest, players must deploy into the hazardous areas surrounding the Dam Battlegrounds. Your primary objective centers around the industrial ruins of the Scrapyard, a location heavily guarded by patrolling drone forces. Approaching this sector cautiously prevents unnecessary early skirmishes that could jeopardize your extraction run.
The area itself is filled with vertical sightlines and collapsed structures that can disorient newcomers easily. Navigating the perimeter requires keeping a close eye on your compass layout to maintain proper positioning. Staying near low cover ensures you can scout the area safely before diving into the active search locations.
Finding the Required Memorabilia
Unlike standard salvage operations, this specific mission tasks you with recovering three distinct items tied to human history. Players must search the rusted wreckage to locate a vintage compass, a forgotten video tape, and a set of old field rations. These collectibles are typically scattered within close proximity to one another inside the main wreckage zones.
Many players find the field rations fairly quickly but struggle to pinpoint the remaining electronic and navigational items. Thoroughly checking inside abandoned vehicles and metallic crates will eventually reveal the missing coordinates. Maintaining patience during this phase is essential since missing a single piece forces you to repeat the deployment.
Securing a Successful Extraction
Gathering all three historical items is only half the battle when operating in the intense world of Arc Raiders. Once the collectibles rest safely in your inventory, you must immediately prioritize reaching the nearest active extraction point. Getting eliminated before escaping means losing all quest progress and forcing a complete restart of the mission.
Coordinates for extraction zones can shift depending on current match parameters and enemy activity levels. Coordinate closely with your squad or plan your solo path carefully to avoid choke points where rival raiders might wait. Depositing these items successfully unlocks subsequent narrative paths and expands your standing within the resistance hub.

Super Mario Bros Wii Cheats And Unlockable Secrets
Mastering the vibrant courses of New Super Mario Bros Wii requires both sharp reflexes and a solid understanding of hidden gameplay mechanics. While the game relies heavily on player skill, the developers included several rewarding shortcuts and hidden features to assist players on their journey. This comprehensive guide outlines the essential milestones and techniques needed to uncover every hidden advantage in the Mushroom Kingdom.
Unlocking Secret Worlds and Cannon Shortcuts
Navigating the expansive map screen reveals that several paths remain blocked until specific conditions are met in earlier stages. Players can discover hidden exits in various levels that lead directly to specialized Warp Cannons, which bypass large portions of the journey. Finding these alternative routes often requires a keen eye for suspicious green pipes or false walls that hide secondary flagpoles.
For instance, discovering the secret exit in World 1-3 grants early access to World 5, drastically shifting your progression order. Similar hidden pathways exist throughout the volcanic regions and desert landscapes, rewarding thorough exploration over simple speedrunning tactics. Utilizing these shortcuts allows players to choose their own pace while discovering how the regional maps connect seamlessly.
Earning Profile Stars and Game Completion Bonuses
Achieving absolute completion in this classic platformer alters the appearance of your save profile to reflect your in-game accomplishments. Players can unlock up to five distinct stars on their file selection screen by fulfilling specific gameplay milestones. The first star is awarded for defeating Bowser in the final fortress, while subsequent accolades require gathering every hidden collectible item.
To earn a flawless profile profile layout, you must collect all three Star Coins in every single level from World 1 through World 8. Additionally, players must unlock every standard and secret exit across the entire world map to prove their complete mastery. Maintaining a pristine save file also means completing the game without triggering the Super Guide assistance block in any stage.
Accessing the Infinite Lives Trick
Accumulating a large reserve of extra lives is a traditional strategy that prevents sudden game-over screens during difficult late-game fortresses. Players can execute a classic infinite life technique in World 2-3 by utilizing a precisely timed jump on a roaming Koopa Troopa. Trapping the shell against a specific staircase allows Mario to bounce continuously, rapidly increasing the life counter up to ninety-nine.
Mastering this mechanical trick provides a reliable safety net for fireteams tackling the unforgiving challenges found within the bonus stages. The massive reserve of items and characters ensures that unexpected mistakes will not reset your structural map progress. If you want to explore more gaming systems or find reliable hardware information, you can check out the H2 Interactive platforms online to manage your digital setups efficiently.
Unlocking the Mysterious World Nine Stages
The ultimate test of skill inside this multiplayer adventure lies within the elusive bonus region known as World 9. Unlike the standard progression zones, these extra stages remain entirely locked until you successfully clear the main story campaign. Once Bowser is defeated, players must return to previous maps to secure their missing treasures.
Each specific level within the ninth world corresponds directly to the total number of Star Coins collected in that respective world number. For example, gathering all Star Coins in World 1 unlocks World 9-1, creating a direct incentive to fully explore every corner of the game. These final stages offer some of the most complex platforming challenges designed to push your skills to the absolute limit.

Broken Age Act 2 Complete Walkthrough And Puzzle...
Double Fine Productions delivered a masterclass in point-and-click storytelling when they concluded their crowd-funded adventure. While the first half of the game introduced players to the parallel lives of Vella and Shay, the concluding chapter subverts expectations by swapping their environments completely. Navigating this final segment requires an analytical mindset, as the environmental obstacles become significantly more complex and deeply interconnected.
Navigating the Environmental Swap
The second act immediately shifts the dynamic by placing each protagonist in the other character's previous starting zone. Vella must now explore the remnants of the mechanical spaceship, dealing with malfunctioning systems and suspicious AI constructs. Meanwhile, Shay finds himself stranded in the pastel-colored cloud settlement of Meriloft, attempting to comprehend the strange traditions of the local townsfolk.
Successfully progressing through these dual storylines demands a strong grasp of how actions in one reality echo across the other. Players can switch between the two characters at almost any time to gather vital clues. Paying close attention to the background details in each scene will often reveal solutions to puzzles that initially seem entirely impossible.
Solving the Hexapal Logistical Conundrums
One of the most notorious challenges in this chapter involves rewiring the small domestic robots known as Hexapals. Players must decipher a complex circuit pattern hidden within the game world to alter the behavior of these mechanical allies. Because the specific wire configurations are randomly generated for every individual playthrough, copy-pasting answers from static guides will not work.
To solve this puzzle efficiently, you must carefully analyze the geometric symbols etched onto the charging stations. Mapping out the burned terminals allows you to safely route the electrical currents without triggering a system short. Understanding these fundamental logic rules ensures you can clear the roadblock and advance the narrative toward its climax.
Unraveling the Grand Finale Logic Chains
The final confrontation brings both narratives together in a tense sequence that tests your complete spatial awareness. Players must coordinate the actions of both characters simultaneously to disable a massive automated weapon platform. A single mistimed interaction can reset your progress, making patience an absolute necessity during the closing sequence.
Managing the dialogue trees with the main computer interface is crucial to unlocking the proper mechanical vulnerabilities. You must share discovered passwords between the protagonists by observing their surrounding console screens. Once the main control nodes are exposed, executing the final sequence rewards players with a beautifully animated conclusion to this memorable journey.

Chocobo Sam Heads Or Tails Choice Guide
Navigating the bustling streets of Wall Market in Final Fantasy VII Remake requires players to make several critical choices that impact their gameplay experience. One of the earliest and most memorable interactions occurs when meeting Chocobo Sam, a flamboyant stable master who uses a coin flip to judge your character. This decision plays a pivotal role in determining which set of side quests you unlock later in Chapter 9.
The Direct Consequences of the Coin Flip
When Chocobo Sam asks you to call his coin toss, you are presented with three distinct options: Heads, Tails, or No Deal. Selecting either Heads or Tails will push the game points heavily in favor of unlocking Chocobo Sam's unique side quests. Conversely, refusing to participate or picking the options that don't match his secret outcome will redirect your progression toward Madam M's itinerary.
Understanding this mechanic is essential for completionists who want to view all the alternative outfits available for Aerith later in the story. The side quest line you secure directly influences the specific dress she wears during the audition with Don Corneo. Therefore, your answer to this seemingly simple question sets off a major chain reaction for the rest of the chapter.
How Points Influence Chapter Nine Quests
The game tracks your interactions behind the scenes through a hidden point system distributed across several conversations. While the coin toss is the most explicit choice, other minor dialogues throughout Wall Market also contribute to the final tally. For example, describing Tifa to Sam or choosing a massage package from Madam M will shift the balance further.
To guarantee you receive Sam's requests, you should lean into choices that favor his business mindset and thrill-seeking nature. If you prefer to explore Madam M's exclusive combat challenges, you must actively pick choices that lean away from Sam's preferences. Balancing these hidden parameters allows players to manipulate the narrative route during subsequent playthroughs.
Replayability and Chapter Selection Benefits
Fortunately, missing out on one specific questline during your initial run will not permanently lock you out of total completion. After finishing the main campaign, the integrated chapter selection feature unlocks, allowing you to return to Wall Market instantly. This mechanic makes it incredibly straightforward to try the alternate choice and pick up the rewards you missed.
Experiencing both branches provides a deeper appreciation for the detailed world-building Capcom implemented into the game's urban hubs. Each path features unique dialogue exchanges, distinct NPC interactions, and varied combat scenarios that test your strategic capabilities. Taking the time to explore every perspective ensures a thoroughly complete adventure through Midgar.

How To Find Rope In Dreamlight Valley Location...
Crafting unique resources is a core element of progressing through the magical world of Disney Dreamlight Valley, allowing players to build furniture and complete essential quests for their favorite characters. Among the various refined materials required early in the game, rope stands out as an indispensable component for structural repairs and neighborhood decorations. Understanding how to acquire this item efficiently ensures that your community projects proceed without unnecessary delays.
Understanding the Crafting Requirements for Rope
Unlike basic structural resources that can be pulled directly from the ground, rope is an exclusively refined material that must be manually assembled. To manufacture a single piece of this item, players must visit any active crafting station scattered across the valley. The conversion formula requires a set amount of fiber, which serves as the foundational material for the transformation.
Newer players might feel confused looking for this resource out in the wild landscapes since it never spawns naturally on the floor. Instead, mastering the multi-tiered crafting system is the only reliable method to stock up your inventory pantry for future villager requests. Keeping a healthy supply of raw materials in your storage chests will save you significant time during intensive late-game missions.
Sourcing Raw Seaweed from the Coastal Biomes
The journey to gathering enough rope starts at the shoreline, where players must collect raw seaweed to jumpstart the refinement process. You can frequently spot this green aquatic plant washed up on the sandy shores of Dazzle Beach after clearing the blocking night thorns. Simply walking along the coastline allows you to harvest these standalone drops directly into your active inventory packs.
If the natural beach spawns run out, you can actively source more seaweed by pulling out your fishing rod near any body of water. Casting your lines into standard water outside of the bubbling ripple circles yields a very high chance of pulling up this valuable plant. This alternative gathering method ensures you can continue collecting the necessary raw items even when the coastline appears completely clear.
Transforming Seaweed into Fiber Components
Once you have secured a healthy amount of aquatic flora, you must visit a local workbench to convert the items into usable fiber. Every individual piece of harvested seaweed yielding five separate units of fiber upon successful refinement at the station. This generous conversion rate makes it incredibly easy to mass-produce the raw elements needed for your construction projects.
Managing your inventory efficiently during this stage ensures you do not waste valuable space on raw materials you cannot use immediately. Refined materials carry a much higher utility for daily valley chores compared to their unrefined counterparts. After completing the conversion, your character will possess the ideal baseline elements needed to finalize the creation of your durable binding cords.
Finalizing the Fabrication Process at the Workbench
With a massive collection of refined fiber resting in your inventory, you can finally select the recipe to complete your building goal. The standard crafting blueprint dictates that eight individual units of fiber are required to create one piece of completed rope. Accessing the functional tab on your crafting interface allows you to execute this final combination seamlessly.
Many prominent quest lines involving Goofy and Donald Duck demand significant quantities of this refined resource to repair damaged coastal docks and ships. Preparing these items ahead of time grants you an exceptional advantage when unlocking new parts of the story. Once the handshake between your materials completes, you can immediately apply your new tools to enhance your custom neighborhood layouts.

FF16 Knight Of The Splendent Heart Location And...
Final Fantasy XVI offers players a massive variety of challenging endgame encounters through its intense Notorious Mark bounty system. Among these high-tier threats, the Knight of the Splendent Heart stands out as a formidable A-rank adversary that tests your combat timing and mastery. Locating this spectral warrior requires specific quest progression and a trip to the northern reaches of Valisthea.
Unlocking the Knight of the Splendent Heart Hunt
Unlike some monsters that appear naturally on the map, this elite enemy requires you to complete prerequisites before it surfaces. You must first unlock and finish the side quest titled Under New Management II, which becomes available late in the main campaign. This specific storyline focuses on Isabelle and the stabilization of the Northreach settlement.
Once you successfully finish the prerequisite questline, the bounty will officially appear on the Hunt Board back at the Hideaway. You can speak with Nektar the Moogle to verify the details and read the lore description. Preparing your equipment beforehand ensures you are fully ready for the sudden spike in tactical difficulty.
Exact Location in the Royal Meadows
To track down this elusive target, you must fast travel to the Northreach obelisk situated within the Holy Empire of Sanbreque. From the town gates, navigate your way directly northward into the expansive fields known as the Royal Meadows. The open landscape makes it relatively easy to navigate without getting lost along the main roads.
Continue moving toward the northernmost edge of the region until you arrive at the prominent structure called the Penitent Gate. The spectral knight will materialize in the center of the path as you approach the massive stone archway. Ensure your health bar is completely full before stepping into the designated engagement zone.
Combat Strategy and Boss Mechanics
The Knight of the Splendent Heart utilizes rapid lunge movements and devastating sword combinations that can deplete your health quickly. Watching his arm movements closely will give you the necessary cues to execute perfect dodges and subsequent counterattacks. Managing your positioning remains essential because his wide sweeping strikes cover a substantial portion of the arena.
During the middle phase of the confrontation, the boss will begin casting advanced magical spells that require continuous movement to avoid. Combining your heavy Eikonic abilities during his staggered state will maximize your damage output before he recovers his defenses. Patience is key, so avoid greedy combos that leave Clive vulnerable to counter strikes.
Rewards for Defeating the Mark
Defeating this challenging A-rank opponent yields highly valuable crafting materials that are crucial for late-game gear upgrades. Successful hunters will receive a significant amount of Gil alongside rare items like Scarletite and Meteorites. These resources allow you to forge or upgrade premium weapons at the Hideaway blacksmith.
In addition to physical loot, completing this bounty grants a generous boost to your overall Renown points. You can redeem these points at the patron counter to claim unique accessories and helpful items. Overcoming this trial brings you one step closer to achieving complete mastery over the Valisthean wilderness.

Does Hunt Showdown Have Crossplay Platforms And Multiplayer...
Crytek's atmospheric extraction shooter continues to captivate players looking for a high-stakes, tactical PvPvE experience in the dark bayous. As the gaming landscape leans more toward unified communities, players frequently ask if they can team up with friends across different systems. Understanding how matchmaking operates across consoles and computers is vital for coordinating your next monster hunt.
Console Crossplay Functionality Explained
Players utilizing PlayStation 5 and Xbox Series X/S hardware can seamlessly enter the same matchmaking pools during active bounties. This shared console ecosystem helps maintain healthy player counts and decreases lobby wait times significantly. However, it is important to note that this functionality is limited strictly to matchmaking rather than direct invite systems.
Because the game lacks a unified internal friend management framework, you cannot natively invite someone on a different console to join your pre-made squad. PlayStation and Xbox enthusiasts must instead rely on simultaneous matchmaking queues to land in the same cooperative session. This setup means that while console crossplay is technically active, playing reliably with friends on a rival console requires patience.
The Barrier Between PC and Consoles
When looking at the broader multiplayer compatibility landscape, there is a strict divide separating PC players from their console counterparts. PC users interacting via Steam do not share servers or lobbies with players on PlayStation or Xbox hardware. This intentional separation prevents the ecosystem mismatch commonly seen in competitive first-person shooters.
The developers maintained this barrier to preserve competitive integrity due to the stark differences in input methods. Precision aiming with a mouse and keyboard offers major mechanical advantages over a traditional controller setup in intense firefights. By keeping these ecosystems separate, the developers ensure that tactical encounters remain fair and balanced within each specific hardware group.
Invites and Third Party Matchmaking Workarounds
For those looking for standard party coordination, inviting players works seamlessly as long as you remain within the exact same ecosystem family. PlayStation users can easily send direct dashboard invites to other PlayStation gamers to form an immediate three-person squad. The same fluid invite process applies to Xbox users and PC players operating through their respective digital storefronts.
If you are determined to bridge the console gap, the most reliable workaround involves adjusting your regional preferences to less populated servers. By coordinating over third-party voice chat applications, players can press the matchmaking button at the identical millisecond to trick the system. While this method is far from perfect, it remains the only viable strategy to team up across competing console ecosystems.
Future Updates and Multiplatform Evolution
Crytek regularly updates the game engine to enhance environmental visuals and improve long-term server stability for the community. The community constantly submits feedback requesting a more robust, cross-platform invitation system to alleviate current grouping headaches. Keeping an eye on official development roadmaps is the best way to track potential overhauls to the current social systems.
As the extraction shooter genre continues to evolve, maintaining balanced multiplayer ecosystems remains a top priority for developers worldwide. The current setup successfully balances fast matchmaking times on consoles while keeping PC competitive fields separate. Ultimately, the system provides a reliable multiplayer environment that respects the mechanical differences of each gaming platform.

Well Well Well Treasure Location Complete Treasure Guide
Embarking on the various side quests scattered across the open world of Hogwarts Legacy provides players with excellent opportunities to explore hidden areas and secure unique cosmetic gear. Among these optional adventures, the quest involving a talking magical well stands out as an intriguing puzzle that relies entirely on a hand-drawn sketch. Tracking down the hidden chest requires players to decipher vague environmental clues and navigate the southern reaches of the world map.
Finding the Magical Well
To initiate this unique treasure hunt, players must first locate the talking well itself, which is situated southeast of the Aranshire hamlet. Navigating up the rocky cliffs path will lead you to the magical structure, which appears to be choking on a stray piece of parchment. Interacting with the well clears its throat and rewards you with a cryptic sketch depicting a lonely tree surrounded by ancient stone ruins.
While the quest does not demand a high level to complete, having a flying mount makes the subsequent journey significantly faster. Players are highly encouraged to unlock their personal broomstick before attempting to track the destination drawn on the map. This preparation prevents tedious foot travel across the vertical cliffs and winding rivers of the southern territories.
Deciphering the Treasure Map
The drawings on the parchment highlight an isolated courtyard containing a stone bridge, a distinctive windmill, and a solitary tree growing amidst broken walls. To find this specific landmark, players need to steer their broomsticks toward the Feldcroft region in the southwestern part of the map. Flying just south of the Irondale hamlet will reveal the sprawling stone ruins matching the illustrations perfectly.
As you approach the specified ruins, look closely for a small island structure connected by a distinct arched bridge near a rushing waterfall. The presence of an Ancient Magic Hotspot nearby serves as an excellent geographical indicator that you are close to the objective. Spotting the single, prominent tree in the middle of the courtyard confirms you have arrived at the correct location.
Extracting the Hidden Reward
Once you land inside the ruined courtyard, approaching the central tree will not immediately reveal a traditional treasure chest on the ground. Instead, players must look up at the foliage and utilize their magical utilities to manipulate the environment effectively. Casting the Levioso spell directly on the tree will gently lift it into the air, plucking the roots completely out of the soil.
Suspending the large plant reveals a hidden container firmly entangled within the floating root system underneath. Approaching the airborne chest allows you to search its contents and successfully secure the rare Treasure-Seeker's Bicorne Hat. Collecting this appearance item immediately updates your gear collection and officially marks the mysterious side quest as complete.

Return To Castle Wolfenstein Cheats Complete Cheat Code...
Return to Castle Wolfenstein stands as a monumental pillar in the history of first-person shooters, blending tense World War II espionage with paranormal horror elements. For PC players seeking to revisit this classic or navigate its most challenging supernatural corridors with ease, activating the built-in developer parameters offers complete control over the battlefield. Unleashing these hidden engine adjustments transforms your tactical approach, allowing you to bypass strict resource limits and fully explore the game design.
How to Access the Developer Console on PC
Before entering specific phrases to alter your session, you must modify the initial execution parameters of the application shortcut. Right-click your game executable icon, open the properties menu, and locate the target destination command line field. Add a space followed by the command string +set sv_cheats 1 directly to the end of the existing file path before saving your changes.
Once the game launches with this parameter active, press the tilde key during live gameplay to pull down the translucent developer console interface. If the command window fails to appear, verifying the initialization variables in your primary settings document remains the fastest solution. Players can naturally test system responsiveness and customize core graphics variables within this input frame to suit modern desktop hardware configurations.
Essential Survival and Combat Command Phrases
The most popular tool among veterans looking to enjoy the narrative without constant pressure is the standard god phrase, which immediately grants complete invincibility. If you find your tactical options restricted by limited resource supplies, entering give all replenishes your inventory with every weapon and ammunition type instantly. These options allow for sandbox-style testing across the dark castle halls and subterranean laboratories.
For players who prefer focused stealth runs without breaking the immersion entirely, typing no target makes B.J. Blazkowicz completely invisible to enemy AI units. You can also bypass physical obstacles or explore hidden developer geometry outside the playable boundaries by inputting noclip into the interface. These specific gameplay modifiers are designed strictly for single-player enjoyment and will not function within active competitive multiplayer servers.
Advanced Level Navigation and Mechanics
Navigating the sprawling campaign chapters occasionally requires jumping directly to specific mission environments to test combat pacing. Entering spdevmap followed by the official map designation allows you to load into any advanced level without completing the prerequisite narrative objectives. This method is highly valued by speedrunners and community modders who need to analyze environmental triggers quickly.
Utilizing system diagnostics helps identify hardware bottlenecks when running this classic engine on contemporary widescreen monitors. Adjusting variables like cg_drawFPS allows you to display a clean real-time performance indicator directly on the corner of your screen. Balancing these helpful rendering indicators with single-player assistance modifiers keeps this legendary shooter accessible and highly entertaining for modern generations.
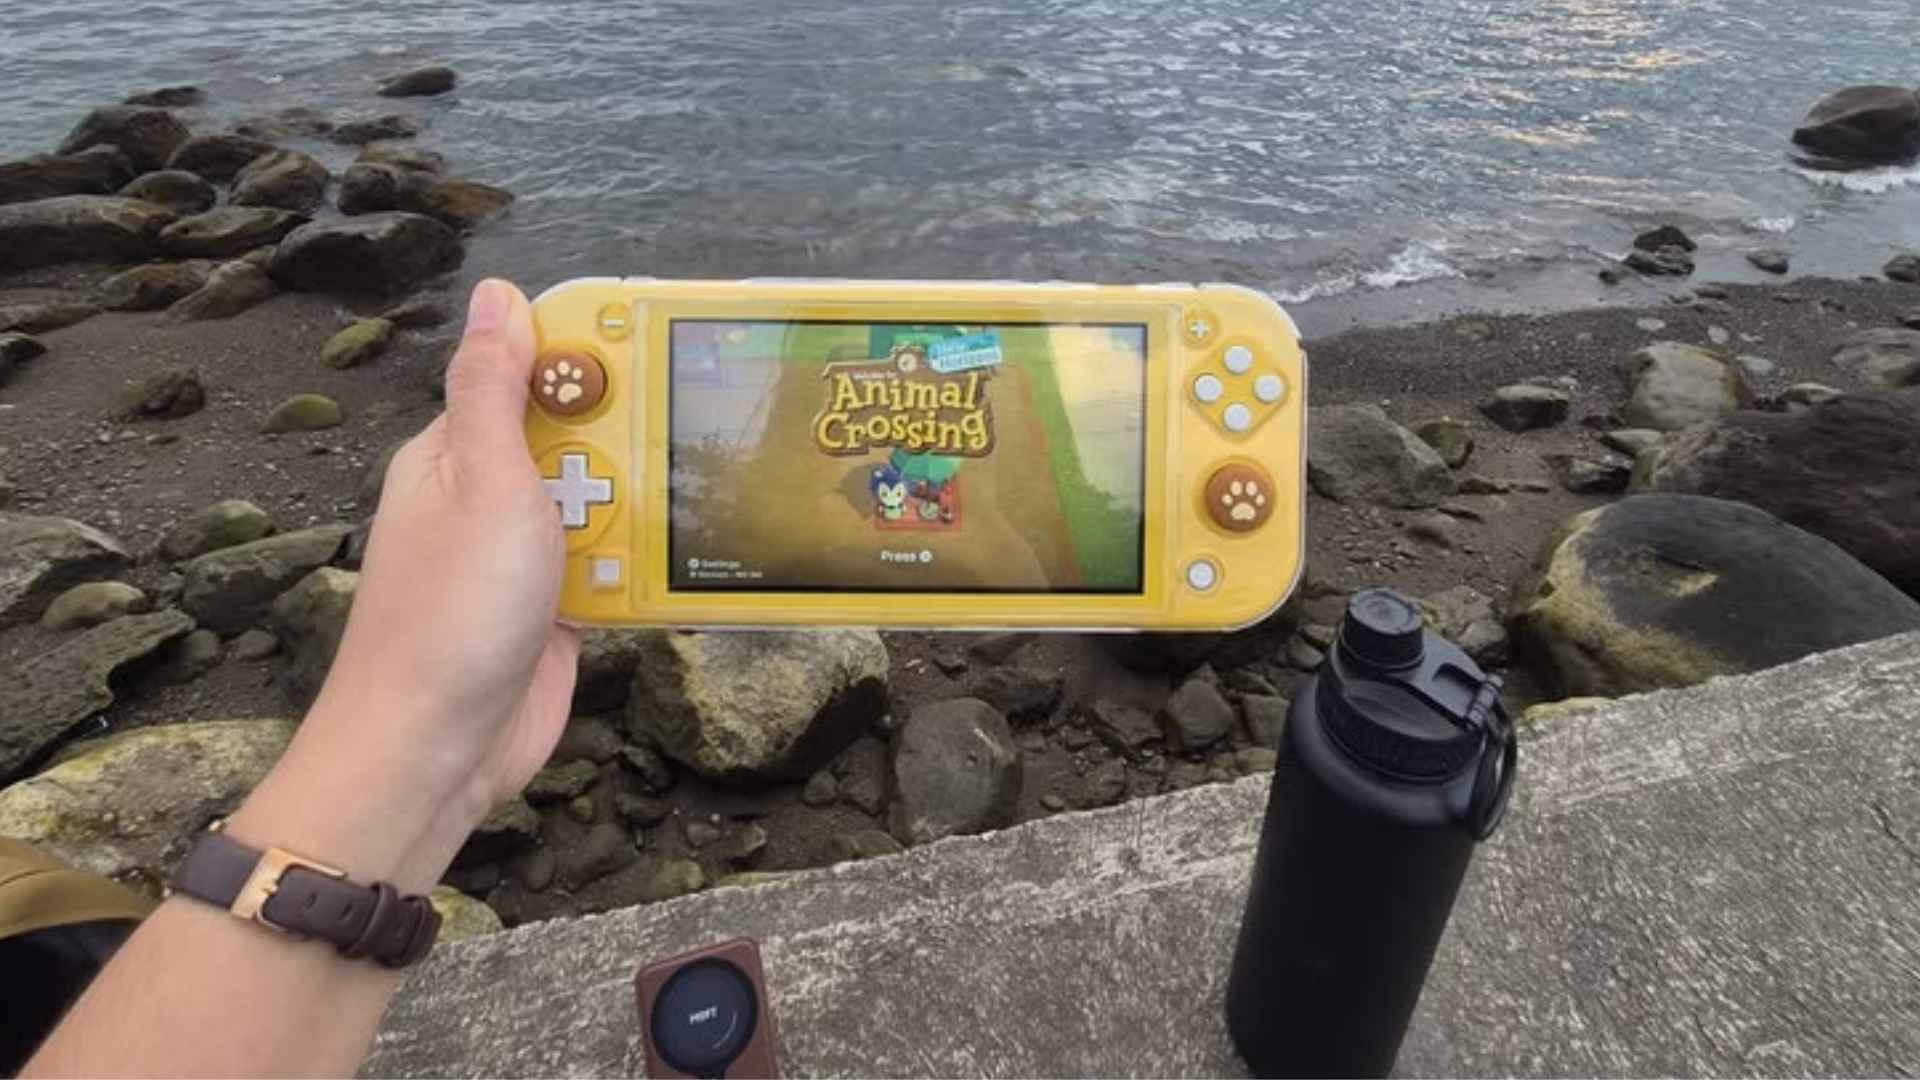
Persona 3 Akinari Social Link Guide And Best...
The Sun Social Link in Persona 3 stands out as one of the most emotionally resonant and memorable storylines in the entire game. Interacting with Akinari Kamiki, a young man confronting a terminal illness, allows players to explore profound themes of life, legacy, and mortality. To fully experience this narrative arc and unlock the powerful ultimate Persona of the Sun Arcana, you must understand the prerequisites and conversation choices needed to maximize your relationship.
Unlocking the Sun Social Link
Before you can begin spending your Sundays with Akinari at the Naganaki Shrine, you need to satisfy a few strict conditions. First, you must unlock and progress Maiko's Hanged Man Social Link to Rank 3, where she will mention seeing a sickly man at the shrine. Additionally, your character must reach Academics Rank 4 to properly introduce yourself and communicate with him during his Sunday afternoon appearances.
Once these initial requirements are met, you must locate Akinari's missing red fountain pen to officially kick off the connection. This specific key item is obtained by speaking to Koromaru at the dorm after he officially joins your party in August. Returning the pen to Akinari will trigger the official start of the Sun Arcana relationship, which uniquely guarantees a rank up during every subsequent encounter regardless of your dialogue points.
Best Dialogue Answers for Early Ranks
During the initial stages of the social link, Akinari will openly struggle with his health diagnosis and the fairness of his situation. In these early conversations, providing responses that validate his feelings without offering empty pity is the best approach. When he asks about the meaning of his existence or the nature of his illness, choosing to listen intently builds a deep mutual trust.
As you progress toward the middle ranks, Akinari begins detailing the plot of a children's story he is writing about a bird and a crocodile. Encouraging his creative endeavors by telling him that the story sounds interesting or asking what happens next gives him immense motivation. These thoughtful responses align perfectly with the overarching theme of finding purpose in the face of inevitable tragedy.
Navigating the Final Stages and Max Rank
In the final ranks of the relationship, Akinari's health visibly declines, yet his outlook on his legacy becomes remarkably clear. He will ask deep questions regarding what remains of a person after they pass away and how his story might impact others. Responding with maturity and affirming that his words will endure provides him with immense comfort during his final days.
Reaching Rank 10 concludes Akinari's story beautifully and rewards the player with the Worn Notebook key item. This invaluable token grants you the ability to fuse Asura, the ultimate and incredibly powerful Persona of the Sun Arcana. Navigating this storyline effectively ensures you witness the full depth of Persona 3's writing while vastly upgrading your late-game combat capabilities.

Call Of Duty World At War Zombies Maps...
The introduction of the Nazi Zombies mode in Call of Duty: World at War changed the cooperative multiplayer landscape forever. What started as a hidden Easter egg quickly blossomed into a foundational pillar of survival horror history for millions of players worldwide. Evaluating how these original maps stack up helps us appreciate the structural evolution of this legendary game mode.
Nacht der Untoten and the Foundation of Survival
As the very first map in the franchise, Nacht der Untoten established the tense atmosphere that defined early survival gameplay. Players were forced to defend a small, ruined concrete bunker against endless waves of the undead with a highly limited weapon selection. While it lacks modern perks or complex Easter eggs, its raw simplicity still provides a pure testing ground for basic survival instincts.
The lack of vertical space or escape routes creates a claustrophobic environment that keeps teams constantly on edge. It serves as a historical reminder of how minimalistic design can achieve immense psychological tension without complex mechanics. For many veteran community members, this baseline experience remains a timeless classic that started an entire subgenre.
Verrueckt and the Introduction of Crucial Mechanics
Moving the battle to an insane asylum, Verrueckt introduced gameplay elements that would become permanent staples of the franchise. This location introduced the concept of Perks-a-Cola machines, electric traps, and separated spawn points for cooperative teams. These additions drastically altered player strategies and forced squads to coordinate their movements across moving sectors.
The terrifying setting and aggressive zombie AI made this map one of the most difficult challenges in the entire game. Navigating the tight corridors required absolute precision and a strong understanding of optimal training routes. It successfully bridged the gap between basic survival and tactical map management for growing teams.
Shi No Numa and the Expansion of the Swamps
Shi No Numa shifted the atmosphere to a misty Japanese swamp environment, introducing dynamic outdoor spaces and unpredictable hazard zones. This expansion introduced the randomized Mystery Box locations and the iconic Hellhounds that altered the pacing of traditional survival rounds. The swamp water itself acted as a physical obstacle, slowing down character movement during critical escape windows.
Players had to adapt to a non-linear layout featuring four distinct exterior huts connected to a central hub. This mechanical variety allowed for diverse defensive strategies and experimental loadouts across different playthroughs. It proved that the mode could thrive outside of rigid industrial structures by utilizing organic environmental threats.
Der Riese and the Peak of Tactical Design
Der Riese stands as the definitive masterpiece of the World at War era, perfectly blending narrative lore with flawless mechanical design. The implementation of the Pack-a-Punch machine allowed players to upgrade their weapons, dramatically increasing their damage output for late-game challenges. Furthermore, the inclusion of teleporters revolutionized map traversal and escape options during overwhelming rounds.
The intricate factory layout provided the ideal balance between tight choke points and open areas for training large hordes. It set the gold standard for all future iterations of the game mode by combining deep storytelling elements with rewarding gameplay loops. You can experience similar tactical depth when exploring new titles, which you can access by visiting inside your gaming browser.

Tactical Strategies for Modern Players
The modern gaming landscape demands more than simple reflexes, pushing competitive individuals toward deep mental engagement and highly adaptive methodologies. Success in today's digital arenas requires a comprehensive understanding of dynamic systems alongside the ability to execute long-term planning. Players who cultivate sophisticated tactical awareness consistently outperform their peers across various genres.
The Importance of Situational Awareness
Achieving victory consistently depends heavily on a player's capacity to maintain strong situational awareness during high-pressure situations. Analyzing the shifting digital battlefield allows individuals to identify critical vulnerabilities in their opponent's layout while reinforcing their own operational defenses. This active evaluation of real-time spatial information ensures that valuable competitive assets are never wasted needlessly.
Furthermore, maintaining clear emotional control prevents the onset of tunnel vision during intense gaming phases. Decisions made in a state of panic frequently introduce devastating vulnerabilities that experienced competitors will exploit immediately. Cultivating patience enables you to recognize the exact moment an opponent commits a vital error.
Balancing Aggression and Defensive Positioning
Successful competitors recognize that absolute aggression without a sustainable backing plan often culminates in rapid failure. Moving deeply into contested territories requires a measured calculation of the associated risks versus potential rewards. Establishing stable defensive perimeters ensures you retain the operational capacity to absorb sudden counter-offensives.
Developing balanced tactical habits separates casual gaming enthusiasts from true master players within the scene. Experienced individuals focus on establishing consistent control over essential zones before pursuing risky high-reward opportunities. This structured framework offers a far more reliable trajectory toward winning intensive matches.
Optimizing Digital Resource Management
Behind every successful offensive push lies a resilient economic foundation that actively supports your competitive presence over time. Efficiently distributing gathered assets enables steady technological upgrades throughout the varying stages of a match. Top-tier competitors regularly choose structural stability over short-lived advantages that could jeopardize their late-game efficiency.
Managing multiple operational processes concurrently enhances your overall effectiveness across the entire active field. Modern competitors often review platforms like M88 Msports Login to analyze how structured interfaces support high-level strategic decision-making in real time. Perfecting this internal economic equilibrium reduces the likelihood of running out of vital options when matches reach their climax.
Analytical Evolution Through Post-Game Study
Reaching elite competitive standards ultimately relies on continuous practice merged with thorough post-match review processes. Spending time studying past performances highlights recurring systemic flaws that require immediate adjustment. Over time, this targeted analytical study builds the sharp instinct needed to navigate complex competitive gaming situations.
Every setback provides a useful learning window that strengthens future planning capabilities and tactical insight. Embracing a progressive mindset transforms challenging defeats into beneficial lessons for upcoming competitive events. Through persistent execution and disciplined preparation, any player can significantly improve their overall gaming mastery.